
|
|||
| 21/08/07 | ||
| Click here for a Panoramic view of my Queen room | ||
12/01/07 |
||
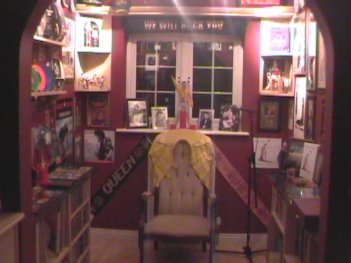
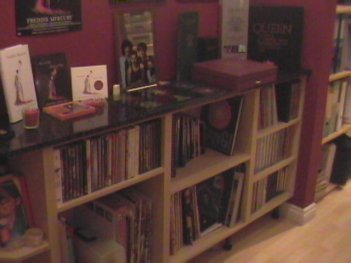
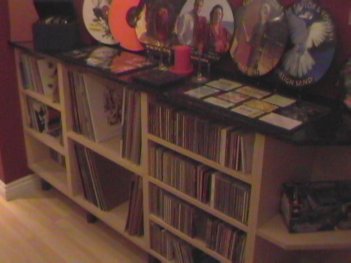
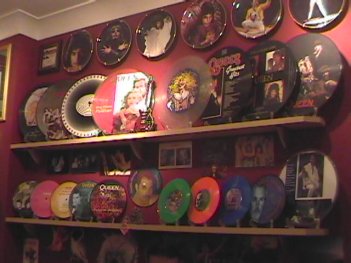
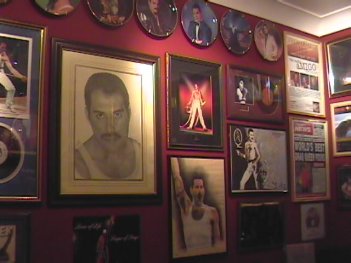
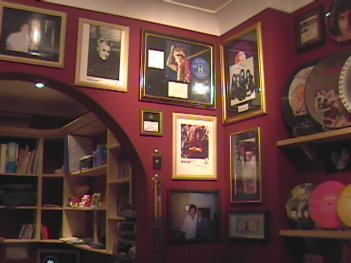
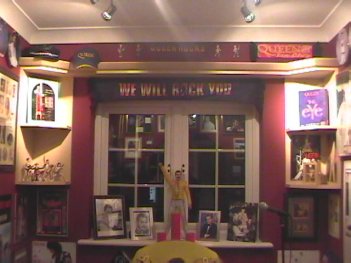
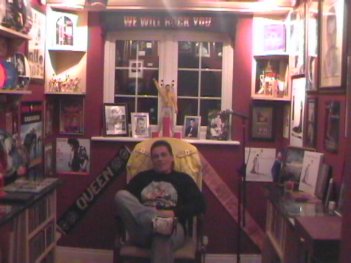
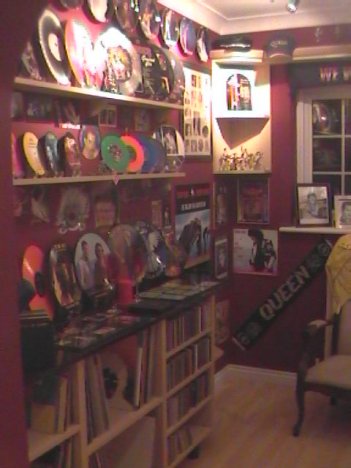
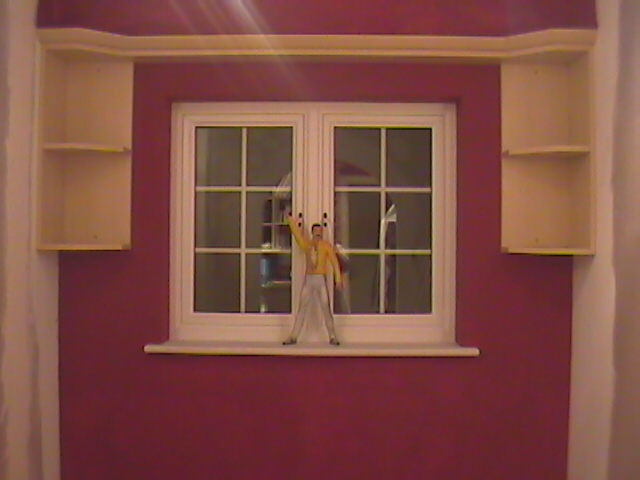
It's happened, the Queenroom is finished at last, I planned this two years ago and now my dream has finaly come true. I have my collection displayed in my home. I am currently still working on the room, just got a few finishing touches to do. When it's 100% I will be changing this page with a little better quality pictures and some write ups but for now here are some pictures I have taken as it stands now. |
||
 |
 |
|
 |
 |
|
 |
 |
|
 |
 |
|
 |
 |
|
 |
 |
|
Well there you have it. :), nearly complete. I'll get some better photos up asap and change this page around and tidy it all up a bit. Just wanna say also that nearly all the stuff you see in the photos are displayed within the site, some might have different frames though. Thanks to all the Queen fans out there for your interest and comments on this project. Check back soon for another update and some interesting info. |
||
Update 29/12/06 |
||
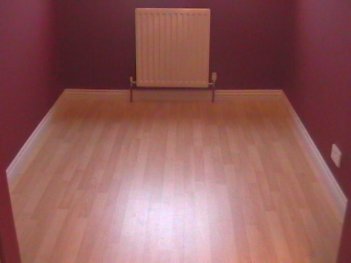
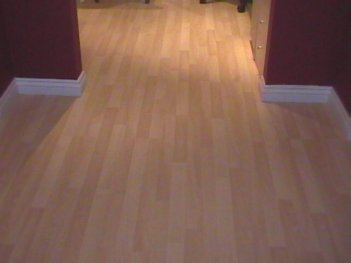
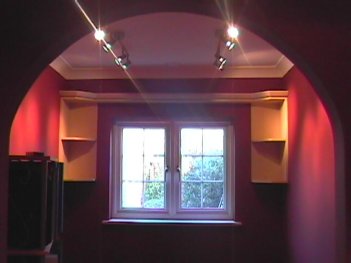
The Queen room is almost finished now, over the last few weeks I have been putting some of my collection on the walls and this task is nearly complete. The last few days has seen me fit the wooden flooring, skirting and finishing off the painting. Today I have started making the furniture that will house the rest of my collection and I should have this done over the weekend if all goes to plan. Now the construction is nearly complete, in my next update I should be able to show you the Queen room finally finished with all my collection on display. Below is a few more pics......of the floor competed. |
||
 |
 |
|
Update 06/11/06 |
||
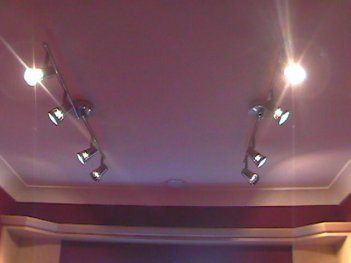
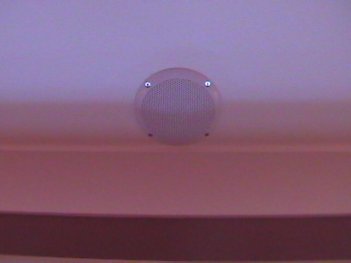
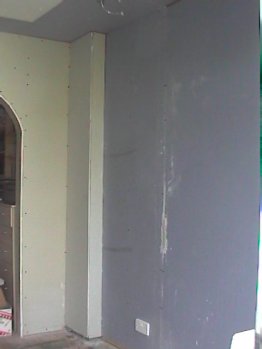
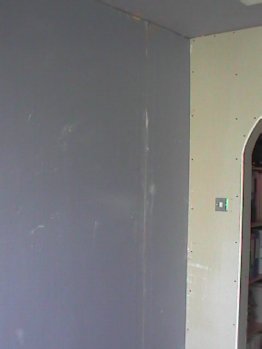
Well!!, the walls and ceiling are now complete including the arch which seperates my study from the queenroom. All the painting has now finished I have also fitted the coving, lights and ceiling speaker, the pic on the right shows the lights and you can just make out the speaker in the distance in the pic. I still have the radiator to fit under the window and paint the window board, then next stage will be fitting the laminate flooring and skirting boards. I will post more pics as soon as I progress. Keep checking back. |
 |
|
 |
 |
|
| Ceiling speaker which will be playing some great tunes in the future :) | A view of the Queenroom from the study end, soon to be filled with my Queen collection. |
|
Update 19/10/06 |
||
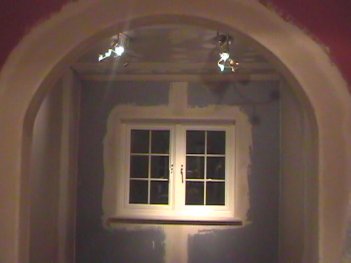
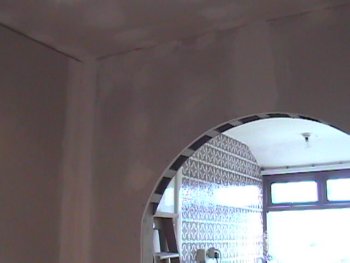
It's starting to take shape now, as you can see from the pics below, the drylining has been completed and the jointing stage is well underway with just a bit more to do. As you can see in the pic on the right the arch is finally near completion and will soon be ready for decorating. also disregard the lights as these are only temperary and still have to buy the lights that will light up the room.....when I find the right items for the job. |
||
 |
 |
|
Check out the pic below, this is the stage I am at the moment. The small slope in the ceiling has now gone as I had to box it in so the coving would follow the ceiling line. The wall around the window (as you can see) is nearly completed and I still have the ceiling and other walls to finish. I have started to fit out the queenroom and below shows 2 open ended units with a shelf adjoining, this is finished off with corniche, and I could'nt resist and put Freddie on the window sill, soon to be his new home, haha. In the coming weeks or knowing me days (hehe) I have to fit the radiator, run cables for my turntable, fit the ceiling speaker and then finally lay the flooring, keep checking back for more updates and pics. |
||
 |
||
Update 02/10/06 |
||
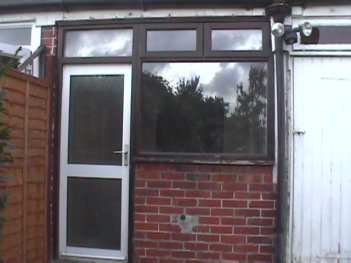 |
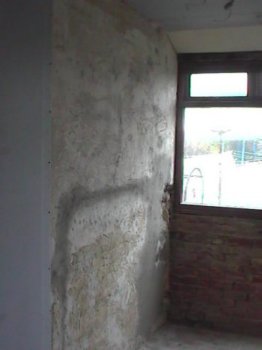
Finally I have progressed with the Queen room, the pic on left shows the outside of the room with the old window and old door that was once part of my old kitchen. I have spent the whole weekend tranforming the back of my home and spent the whole of Friday till late ripping all the old stuff out and filling a skip and getting it ready for bricklaying. You can just make out the outside toilet door in the pic, well this will eventually end up being an inside cloakroom but first things first and that is getting this Queen room finished.
|
|
 |
||
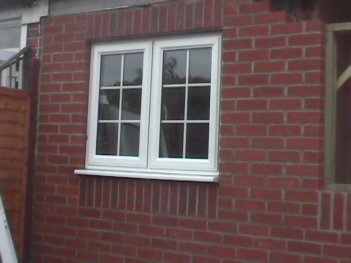 |
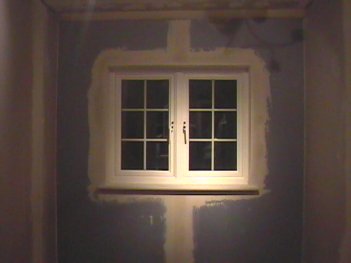
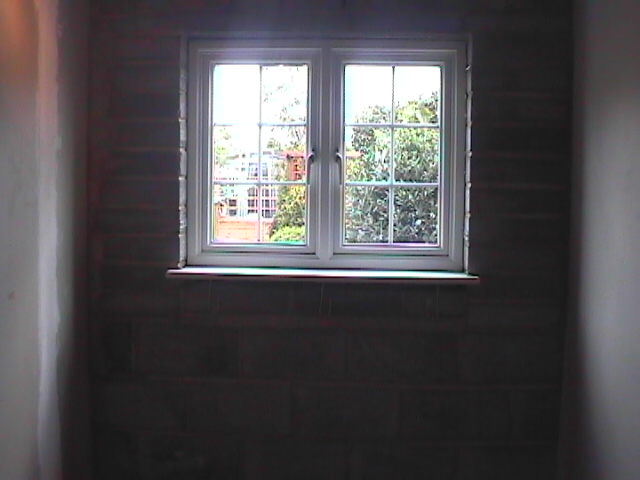
This is the outside sunday morning after the brickies had worked like trogans to get this done in a day, there is a small bit of work to finish to the rest of the house but I was well chuffed to finally get this bit done out the way. I have been waiting a long time to finally see the Queen room at this stage. I fitted the window on sunday and also fitted the window board inside, and had a big clean up progress going on. The pic below shows the inside of the Queenroom and now I can really push on and get this done. It wont be long now before there will be something to really interest all the Queen fans out there. |
|
 |
||
Keep checking back for more pics and the progress of what will be a room any queen fan would be proud of. |
||
Update 31/5/06 |
||
Here's the latest update for the Queenroom, which is an on going project at the moment when time allows, the room has been cleared now and the main construction stage is neary complete. The picture on the right shows the old larder cupboard that was part of the kitchen, it has now been knocked out and studded up. Just for reference the other side of this will eventually end up being our cloakroom or downstairs toilet. In the picture you can just make out the old gas pipes that served the kitchen area in the past, there were a lot of old gas pipes here as well as water pipes and old electical wiring which all had to be removed. All the old services were taken out as well as the brick wall adjoining the old larder cupboard. Temporary shelves were put up in here for use as a storage area for the time being. |
 |
|
 |
This picture shows all the holes filled where the gas and water pipes were, all the old plaster has been removed from the existing walls and everything unibonded. The studwork has been boarded with soundbloc plasterboard. You can also see in this pic that the inside skin of brickwork has been taken down under the window, eventually this will all be removed and a new single window will be fitted with new inside and out cavity walls, this will be the next stage of the project which will really see the room push on for completion. Below shows each side of the Queenroom now fully drylined and ready for jointing, you can also make out the new electrical points fitted. |
|
 |
 |
|
 |
||
This is how we stand at the moment (pic above). All the walls, ceiling and arch are ready for jointing which is my next job, then the window and door has to be removed and a new brickwork wall formed with new window fitted. Hoping a good brickie I know will be round to do this for me very soon. Keep checking back for more pics and updates of the making of my Queenroom. Andy |
||
Update 14/3/06 |
||
The work has kick started again over the weekend...at last. I have just been too busy with my job and other projects going on around my home to really get going in here, but it should be full steam ahead now hopefully with no hold up's or problems to overcome. |
 |
|
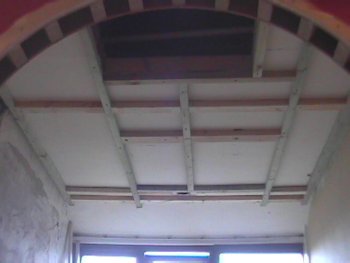
My next job was to batten and noggin out the ceiling ready to take the new plasterboard, the two pics shown below show how the ceiling looked before the timber was screwed up and after the work was done. Look closely you will notice a speaker in the ceiling. I have these positioned around my home where they all feed to either my technics stereo or my pc through a control box where I choose what room I want to play the tunes in. |
||
 |
 |
|
Before battening |
After battening |
|
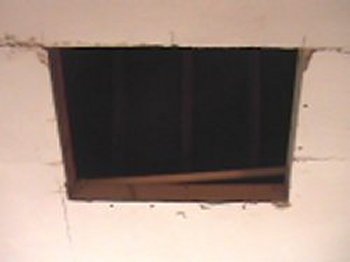
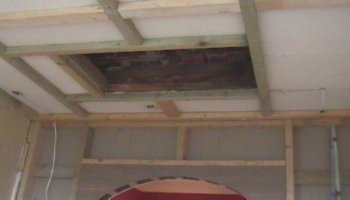
The next stage for me was to sort out all the electrics in this room, all the old wiring and fittings in here are to be replaced with new and most of this work was done at this stage. In the pic above right you will notice two noggins in the ceiling, these have been positioned here ready to take the new light fittings. The pic on the right shows the hatch and arch from another angle. All the wires located here on the right of the arch are the speakers wires and cat 5 computer cables that feed around the whole of my home. |
 |
|
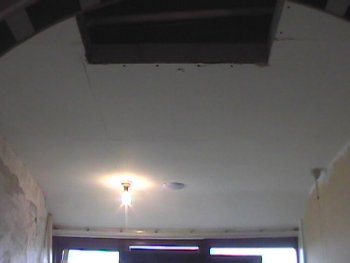
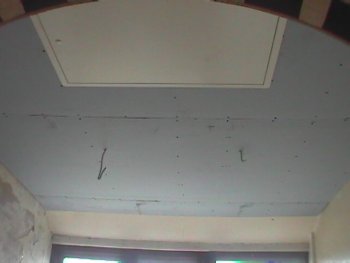
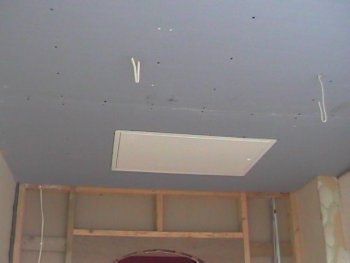
Next was the plasterboard covering, in this room I chose to use sound bloc on the ceiling and walls as I know in the future it's gonna get noisey in here. A straight forward job to do and changed the room so much already. The two pics below show the ceing plasterboarded and the new trap hatch fitted into place. The wires in the ceiling are there ready to connect the new lights that will be pointed towards the walls. |
||
 |
 |
|
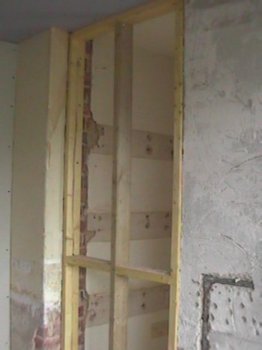
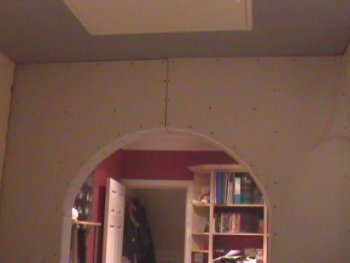
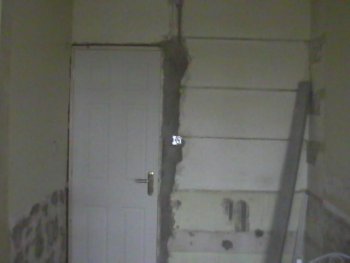
The last picture in this update is of the arch. The arch is now completly plasterboarded and ready to be jointed. In my previous update you will see the arch from the other side and of how it will look when the jointing has been done. Also at this stage of the project I entered the loft space and renewed all the glasswool insulation and lagged any pipework that was needed. My next job for this room will see me tackle the walls which are not too great so needs lots of work before I can fit the sound bloc covering to them. Keep checking back to see how I'm progressing. Andy |
 |
|
Update 8/8/05 |
||
Well the Queenroom has finally got under way, and at this stage most of you wont be really interested in what I will put here to start with as I am in the construction stage at the moment and will show how the progress is going through each stage. It will be a while before there will be anything Queenie to look at but for those who have an interest in the construction side of the project can check here for regular updates and pictures of the room as it shapes up. As a carpenter & builder all the work will be done by myself so on a timescale I hope to have this room finished by christmas if all goes well and have the Queen collection neatly displayed here. |
 |
|
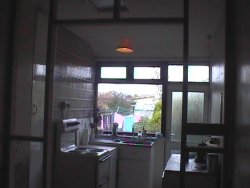
The picture on the right is the initial state of the future Queenroom just after I moved into the house, as you can see it was the kitchen to the house and not a good one at that, the stud wall that is shown in the picture is the arch adjoining the study, I decided to divide the room in two to keep the Queen collection seperate from the study area my only worry is the wall space, as I have a lot of items that would look good displayed on either side of the room. |
||
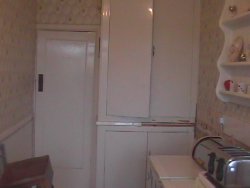 |
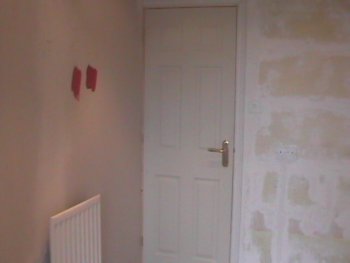
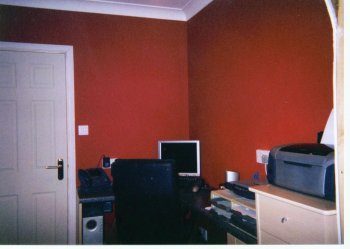
This is the other end of the kitchen as when we moved into this home, as you can see very outdated and definatly in need of some work. I decided to add a study to the house here which is the other end to what is going to be the Queenroom, only seperated by a small archway. The ceiling has been lowered and all the walls drylined, I have added a new frame and door which has been swung the other way. Spotlights have been fitted to the ceiling and new electrics installed, I have fitted worktops and made all the furniture in this room to suit my needs. The colour I chose for the walls are a similar colour to the website, the Queenroom will also be this colour. Below are pics of the study through its progress. |
|
 |
 |
 |
 |
 |
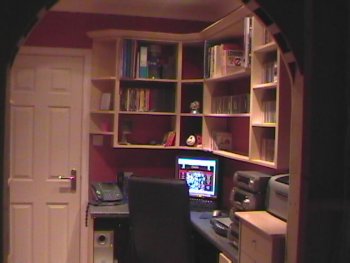 |
The picture on the above right is how the study stands at the moment, it is nearly finished just got a few finishing touches to make, the wooden flooring wont get done until the Queenroom has been finished, but this end of the Queenroom is virtually complete. |
|
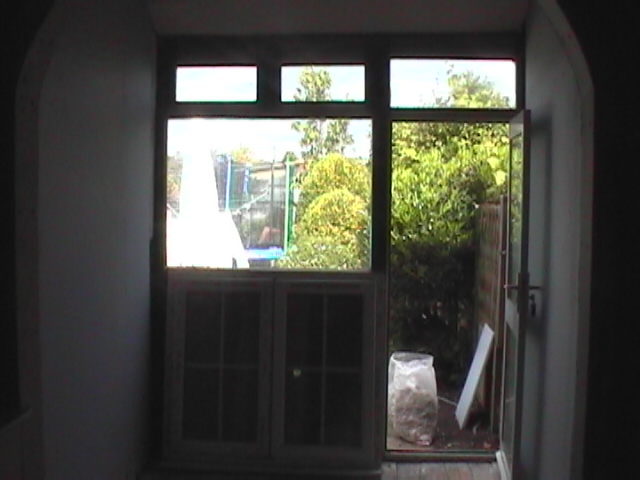
The pic on the right shows the area where the Queen collection will be homed, as you can see we still use the cooker at the moment, but it will be going soon as I can finally fit the oven & hob into the new kitchen. I have the window which will be put into place instead of the excisting door and window which is already there and the area is basically clear ready for me to start work on. I will be lowering the ceiling in here slightly and all the walls will be drylined. Tilting spotlights will be added and I am still working on the design of the furniture and shelving. I have most of the materials here to get cracking on it as soon as, and hoping to crashing into this within the next couple of weeks if time allows. |
 |